10/22/2020: The first video today covered the creation of grass for the house scene that is the subject for this Maya tutorial and I couldn’t wait to dive in and start experimenting with what it introduced. This video introduced two features – one, “Paint Effects” which are paintbrush like mesh generation tools that was used to paint simple (but convincing) grass. The other, which immediately got me experiment, was instancing with MASH. To aggressively oversimplify, MASH was used to scatter arbitrary geometry across an arbitrary surface. The tutorial used the paint effect brush to make a patch of grass, then used MASH to scatter that patch of grass and randomly rotate it across a “lawn” surface. With just basic materials and the Maya ray tracing renderer (named “Arnold” for some reason) it was trivial to make a pretty convincing looking lawn. It was also an impressive test of Maya’s rendering capabilities, because it handled me rotating a scene with comfortably over ten million verts in it without any kind of trouble at all. The raytracing certainly chugged on it, but I digress.
The first thought was, as has been an unofficial theme of these first two months – greebles. So I fired up my little Taiidani scout-like sketch, made a real simple panel, and started trying to scatter that across the geometry using MASH like I’d just been shown. This definitely showed some strengths and weaknesses of just slapping MASH onto some complicated geometry. When using a mesh as input, you have a couple of different distribution types across that mesh. “Scatter” was what we used for a lawn and for a lawn it works great. For the more complicated shape I’ve defined for the fighter’s fuselage there’s quickly issues apparent: MASH has no way of knowing what’s an appropriate place to put a fairly large chunk of detail on (see below):
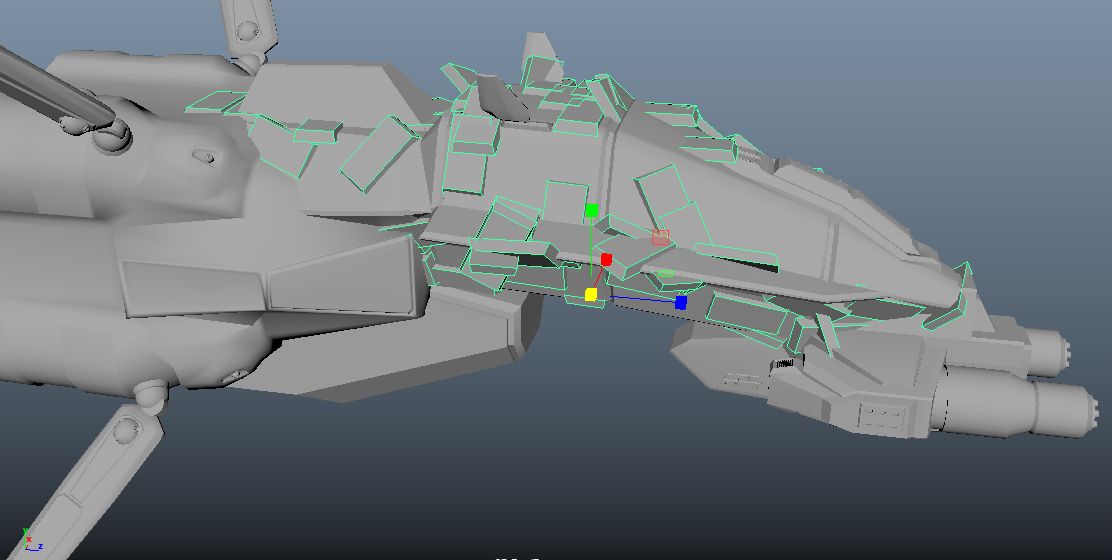
The geometry can be distributed to a random face’s center and then scale the tiled geometry to the face, but that encounters a few more issues: namely I’ve bevelled a lot of panels into the fuselage already. There’s a few that look pretty good but a lot that does not look good (see below):
Creating geometry that serves as a mask works a bit better – here I extracted the largest faces in the second and third sections of the fuselage and used that as my target mesh to scatter panels across. I also used a MASH random node to introduce some random scaling differences. On a few of the panels it looks pretty good still but there’s no way to avoid the awkward diagonal panels. The most obvious use case I can think of is something like a Star Destroyer which has enormous flat panels without the more complex geometry of a Homeworld style spaceship. Another obvious use case is in building detail panels that can then be more meticulously placed into the model (see below):

This panel took a lot longer to make than I’d like to admit. The goal was to try to get something that was crusty with some natural feeling gaps, very much Star Destroyer tiling style. Some overlap is visible which is not a great look, and there’s two different MASH networks – one with the vertically extended panels and one with the horizontally extended panels as the MASH random function doesn’t seem to be able to have stairstepped rotation (so randomly choose rotations at 90 degree increments does not appear possible at this time). It’s still looking like handbuilding more complicated detail pieces is going to be required – I made a really fun little vent that looks awful scattered over this area (see below):

Another outcome that surprised me was that the MASH network outputs geometry, but that geometry tends to cause Maya’s boolean tool to crash. I’d wanted to try and create snakey intrusions on a panel but that didn’t work out even with plenty of subdivisions.
From the other videos an offhand comment intrigued me greatly: “I like to attach paint effects strokes to curves and then convert the strokes to polygons as a way to quickly create cables and wires and stuff.” After following along I tried my hand at a quick HW style three-pipes detail object with gratifying results after ~30 minutes. Most of it was trying to get perfectly straight tubes except for the turns:

And that concluded the Eric Keller intro to Maya 2019 series. I’ll have to figure out for sure what my next project will be to try and use all of the lessons in this tutorial. One option is to create a (probably simpler) house with various bits of lawn ornamentation and lit accordingly. Another option is to pursue existing projects – either a Homeworld frigate or perhaps a Freespace fighter. I’ve got a tutorial lined up for a robot character so I may hold off on the giant robot until then.
One reply on “Day 11”
Congrats on completing that class. What kind of a rig are you doing all this on?